
If you’re weighing a church LED wall against projection or LCD video walls, this guide is your one-stop playbook. We’ll simplify the tech, show where LED shines in ministry environments (sanctuary, IMAG, outdoor signage), and give you 2026-ready sizing, pixel pitch, and budgeting rules you can act on. As The Audiovisual Consultant, we’re vendor-agnostic and focused on practical, church-specific guidance that improves clarity, engagement, and stewardship.
“The global video wall market is projected to reach USD 20.37 billion by 2030, growing at an 11.7% CAGR (market size estimated at USD 11.71 billion in 2025).” – Source
What this article covers
- Definition: what an LED video wall is and how it differs from projection and LCD video walls
- Church applications: indoor sanctuary backdrops, IMAG, lyric display; outdoor marquees and event signage
- Tech primer: LED vs LCD vs microLED
- Sizing and pixel pitch for worship spaces
- Indoor vs outdoor specs (brightness, IP rating)
- Infrastructure: power, HVAC, rigging, control systems
- Content workflows (ProPresenter, cameras, livestream)
- Top vendors and price comparison for churches in 2026
TL;DR
- For most sanctuaries, a fine-pitch dvLED wall (P2.5–P3.9) offers superior brightness, contrast, and flexibility versus LCD or projection
- Plan based on viewing distance first, then size, then budget; use 16:9 when possible for content simplicity
- Indoor brightness: ~800–1200 nits; Outdoor brightness: 3500–6000 nits with high IP rating; choose pixel pitch by first/closest row
- Total project budget includes display, processing, structure/rigging, electrical/HVAC, control, commissioning, content
Who this is for
- Pastors, tech directors, and church admin teams
- AV integrators and facility managers evaluating LED upgrades
- Any ministry comparing LED vs LCD/projection costs and performance
Why trust this guide (The Audiovisual Consultant)
- Independent, vendor-agnostic education for commercial AV buyers with a focus on stewardship and outcomes
- Church-specific experience in sightlines, speech legibility, IMAG/camera integration, and day-to-day operation of LED systems
What is a Church LED Video Wall? LED vs LCD vs microLED
A church LED wall (also called a church LED display or dvLED wall) is a seamless, modular display built from LED wall panels that form a single large screen. Unlike projection and tiled LCD video walls, dvLED is bezel-free, extremely bright, and designed to scale to any size or aspect ratio – ideal for sanctuaries, IMAG, lyrics, and outdoor marquees.
“For Basic Decision Making (BDM) content, AVIXA’s DISCAS standard recommends image height ≈ farthest viewer distance ÷ 6.” – Source
Direct-view LED (dvLED) explained
- Modular LED wall panels; pixel pitch (mm) determines resolution
- dvLED walls are built from cabinet-sized panels (often 500×500 mm or 500×1000 mm) that tile together. Each panel contains LED modules with a specified pixel pitch (e.g., P2.5, P3.9). Smaller pitch = tighter pixels = higher perceived resolution at closer viewing distances.
- Scales to any size/aspect; seamless, no bezels
- Because dvLED tiles edge-to-edge, the display reads as one continuous canvas – no “grid” lines. You can build traditional 16:9 canvases for IMAG and lyrics or creative layouts (stacks, ribbons, and curves).
- Processing and control
- LED controllers map and drive the wall. Common options include Novastar controllers and processors (see Novastar LED controllers: https://www.novastar.tech/) and high-end processing from Brompton Technology (https://www.bromptontech.com/) for advanced calibration, HDR, low-latency IMAG, and dynamic calibration across mixed batches.
LED vs LCD video walls for churches
- Bezel-free vs tiled LCD seams
- LED is seamless. LCD video walls use multiple LCD monitors with ultra-narrow bezels that still create visible grid lines. For lyrics and speaker close-ups, bezel breaks can be distracting.
- Brightness/contrast and ambient light handling
- dvLED typically delivers higher sustained brightness with superior contrast and off-axis performance, making it resilient against stage lighting and ambient daylight. LCD can look great in controlled light, but reflections and reduced contrast are more common in large sanctuaries with mixed lighting.
- Serviceability, lifespan, and color consistency
- dvLED panels are front-serviceable; individual modules and power supplies can be swapped quickly. Modern LED processing (e.g., Brompton/Tessera or Novastar) supports uniformity and color calibration across panels. LCD walls may require full panel replacement to address failures or uniformity shifts over time.
- When LCD still makes sense
- For small lobbies, constrained budgets, or 24/7 signage where a modest-sized display is sufficient, a tiled LCD wall or a single large-format display can be very cost-effective and simple to deploy.
LED vs projection (lamp/laser)
- Ambient light and stage lighting washout
- Projectors rely on reflected light; any ambient light reduces contrast and washes out content. dvLED emits light directly, maintaining contrast with house lights up.
- Throw distance constraints; shadows; screen gain
- Projection needs correct throw distances and lensing. On-stage movement can create shadows with front projection; rear projection demands substantial backstage depth. Specialty screens can help, but add cost and complexity.
- Laser projector TCO vs dvLED at larger sizes
- Laser projectors improve brightness stability and reduce lamp costs, but at large image sizes (e.g., 200–300 inches and beyond), dvLED often wins on long-term brightness, contrast, maintenance, and no screen needed. When factoring in brightness retention, serviceability, and operating hours, dvLED can be the better total-cost-of-ownership for big canvases in high-ambient sanctuaries.
microLED snapshot
- What microLED is
- microLED uses microscopic self-emissive LEDs to achieve ultra-fine pixel pitches (sub-1.0 mm) with exceptional peak brightness and black levels – aimed at premium, close-up viewing.
- Where it fits (ultra-fine pitch, premium budgets)
- microLED is ideal for extremely fine detail at short viewing distances (e.g., broadcast studios or executive briefing centers).
- Why it’s still niche for most churches in 2026
- Cost per square foot remains significantly higher than mainstream dvLED. Most sanctuaries get excellent results with P2.5–P3.9 dvLED for a fraction of the price.
Worship-specific benefits
- IMAG clarity for back rows; lyric readability; engagement
- Fine-pitch dvLED keeps faces lifelike and lyrics crisp for farthest seats, reducing eye strain and improving participation. It pairs naturally with ProPresenter and popular switching systems for clear song text, scripture, and message points.
- Creative stage design: curved, segmented, and flown walls
- dvLED opens up scenic creativity – curved walls, segmented columns, flown arrays, and wrap-around canvases. With compatible processors (e.g., Novastar, Brompton), you can drive multiple canvases, map creative layouts, and maintain uniform color and brightness across the entire stage.
Product references:
- Novastar LED controllers: https://www.novastar.tech/
- Brompton Technology: https://www.bromptontech.com/
Indoor vs Outdoor LED Screens for Churches
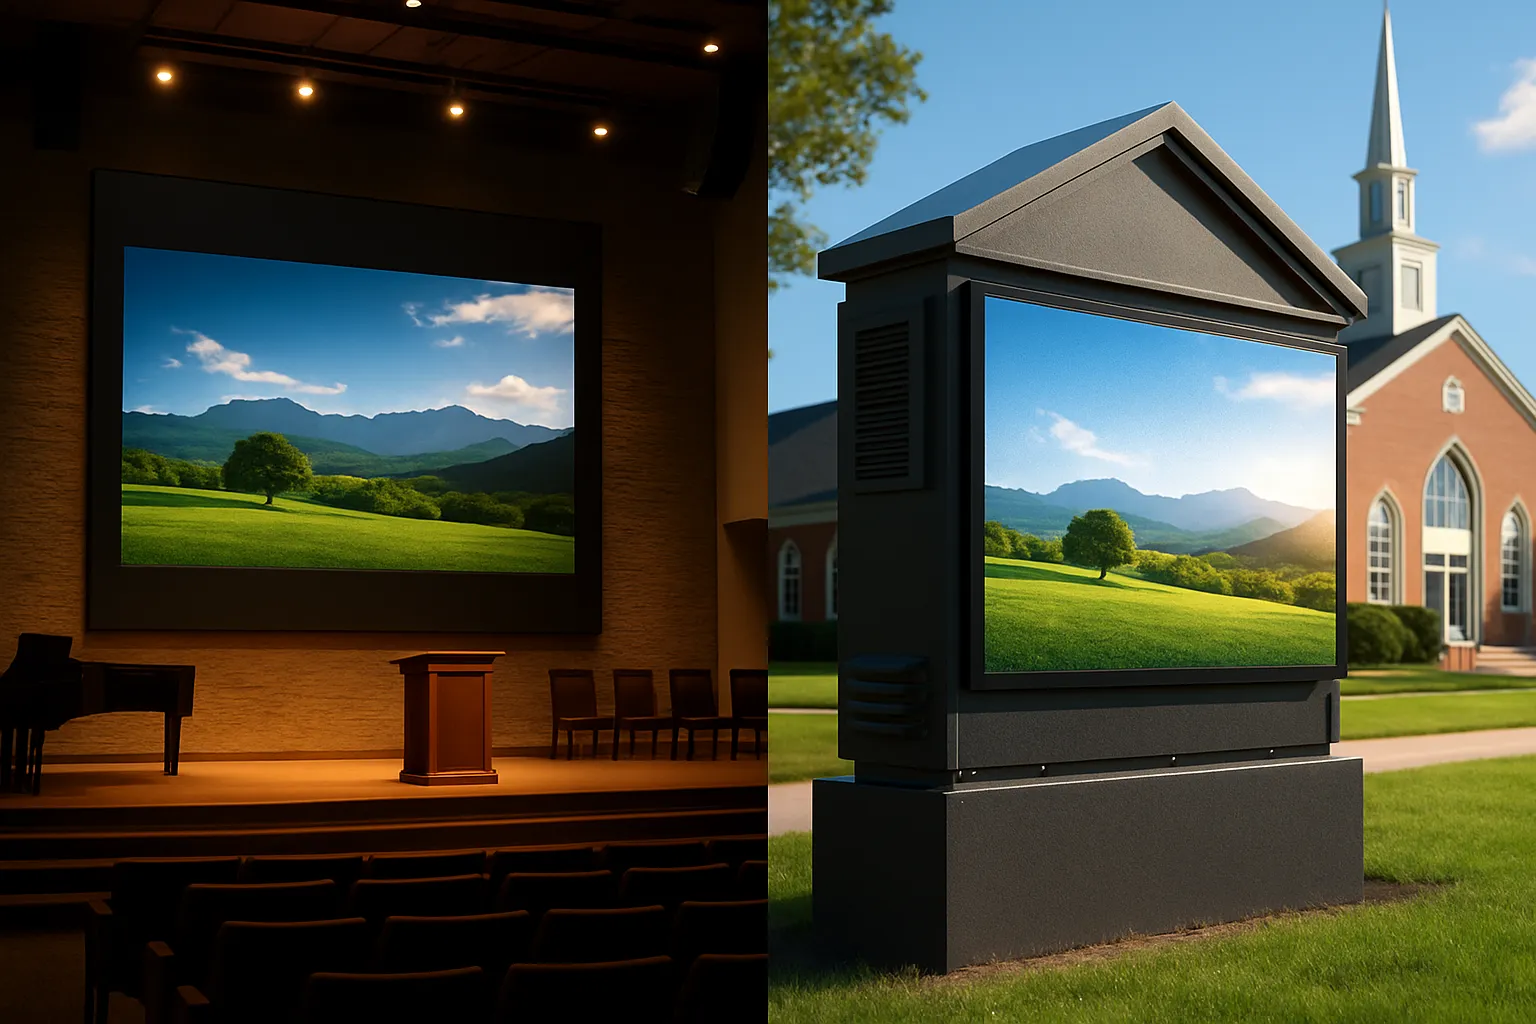
Indoor sanctuary and multipurpose spaces
- Brightness targets: ~800–1200 nits; aim for high native contrast and black-masked modules to preserve shadow detail under stage lighting.
- Pixel pitch: P2.5–P3.9 typical, selected by first-row viewing distance and lyric legibility. Closer seating favors finer pitch.
- Refresh rate for cameras/IMAG: ≥ 3840 Hz preferred to minimize scan lines, flicker, and moiré with broadcast shutters and variable frame rates.
Outdoor church signage and event displays
- Brightness: 3500–6000 nits for full-sun readability; pair with automatic brightness control for dawn/dusk/night comfort.
- Weather protection: Target IP65+ front and IP54+ rear with sealed power/data bays, UV-resistant masks, and corrosion-resistant frames for long-term exposure.
- Pixel pitch: P4–P10 depending on viewing distance (street vs. plaza). Larger pitches remain crisp from road distances and reduce cost per square foot.
Environmental and code considerations
- Structural and safety: Account for wind loads, snow/ice (where applicable), and seismic considerations; obtain engineered drawings and local permits. Coordinate with building officials and AHJs.
- Electrical and thermal: Dedicated circuits, surge suppression, and adequate ventilation/HVAC planning for indoor walls; outdoor cabinets need drainage and temperature management.
- Light control: Use auto-brightness sensors and night-time dimming schedules to meet municipal lighting ordinances and remain neighbor-friendly.
- Optional reference for IP ratings: IEC 60529 overview (IP codes): https://www.iec.ch/ip-ratings
Content differences
- Indoor: Lyric readability, IMAG, scripture, message points, and ambient visuals that complement worship without distraction.
- Outdoor: Service times, events, holiday schedules, wayfinding/parking messages, and urgent notifications; use high-contrast, bold graphics for drive-by legibility.
Sizing, Pixel Pitch, and Viewing Distance for Church LED Displays
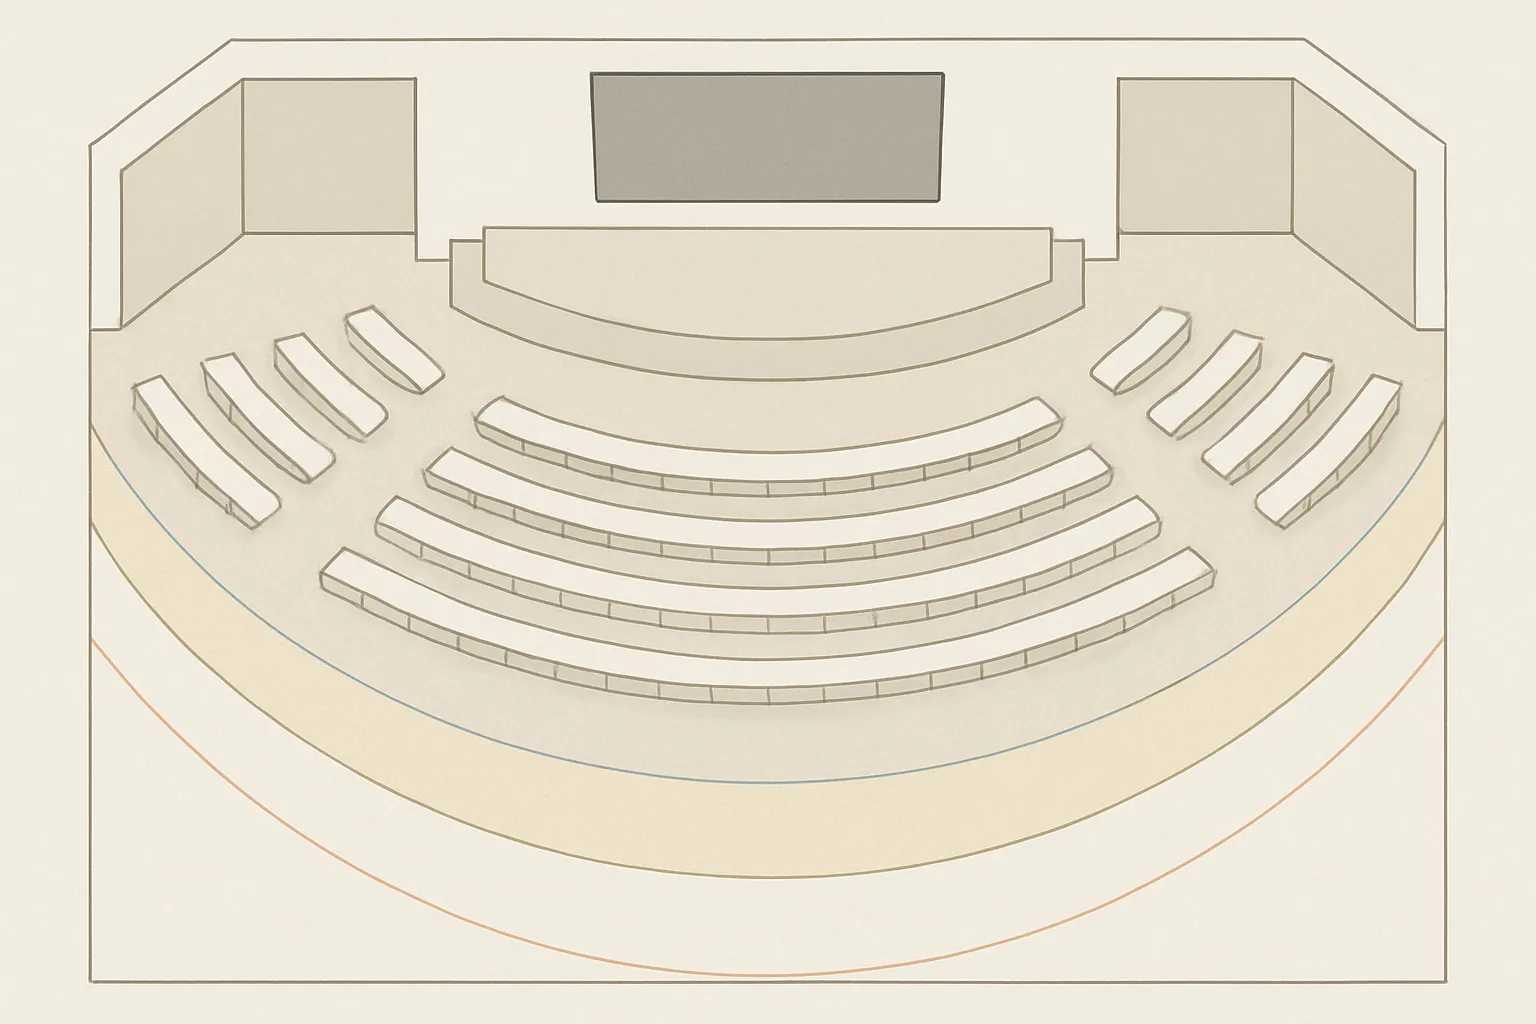
Step 1: Map seating and critical viewing distances
- Capture three distances: first row (closest), farthest seat, and an average or mid-house distance. These drive both pixel pitch and overall image height.
- Prioritize content types: lyrics and scripture require fine detail and crisp edges; IMAG (camera shots of speakers/band) emphasizes face recognition and motion handling.
Step 2: Pick pixel pitch by closest viewer
- Rules of thumb vary because they’re derived from different visual acuity assumptions and units:
- Feet-based guide: minimum comfortable viewing distance ≈ 2.5–3.5 ft per 1.0 mm of pixel pitch.
- Meter-based guide: ≈ 1–1.2 meters per 1.0 mm of pitch.
- Fine-pitch trade-offs:
- Cost: smaller pitch increases LED density and price per square foot.
- Processing: finer pitch increases total pixel count and headroom needed in LED controllers/processors.
- Power/thermal: more LEDs mean higher power draw and thermal load – plan electrical/HVAC accordingly.
Step 3: Choose aspect ratio and size
- 16:9 simplifies content creation (ProPresenter, video, slides). For scenic backdrops and wide stages, 32:9 and ribbon layouts create immersion while keeping IMAG canvas(es) 16:9.
- Respect ceiling height, sightlines, and lighting positions. Keep the wall’s bottom edge high enough for choir/orchestra sightlines and avoid blocking beam paths for key and back lights.
Step 4: Verify with camera/IMAG
- Moiré mitigation: test camera distance, focal length, and aperture against your chosen pixel pitch; finer pitch reduces moiré risk.
- High refresh (≥ 3840 Hz) and appropriate shutter angles reduce banding and scan artifacts.
- Use test patterns, gridlines, and rehearsal checks to validate focus, exposure, and latency through your switcher/processor chain.
Quick cheat sheet (use with DISCAS)
- Use the table below as a starting point. Validate final image height/width with AVIXA DISCAS for your specific viewing tasks.
| Pixel Pitch (mm) | Minimum Comfortable Viewing Distance (ft) | 16:9 Width x Height (12 ft wide) | 16:9 Width x Height (16 ft wide) | 16:9 Width x Height (20 ft wide) | 16:9 Width x Height (24 ft wide) | Suggested Closest Row (ft) |
|---|---|---|---|---|---|---|
| P2.6 | ~8–10 | 12 x 6.75 | 16 x 9.0 | 20 x 11.25 | 24 x 13.5 | ≥ 9 |
| P2.9 | ~9–12 | 12 x 6.75 | 16 x 9.0 | 20 x 11.25 | 24 x 13.5 | ≥ 10 |
| P3.4 | ~11–14 | 12 x 6.75 | 16 x 9.0 | 20 x 11.25 | 24 x 13.5 | ≥ 12 |
| P3.9 | ~12–16 | 12 x 6.75 | 16 x 9.0 | 20 x 11.25 | 24 x 13.5 | ≥ 13–14 |
| P4.8 | ~15–20 | 12 x 6.75 | 16 x 9.0 | 20 x 11.25 | 24 x 13.5 | ≥ 16–18 |
Notes:
- 16:9 heights are shown for common widths; adjust to your stage and sightlines.
- Treat distances as guidelines. Validate with AVIXA DISCAS to ensure readable text sizes for lyrics and scripture and comfortable facial recognition for IMAG.
Budgeting and Total Cost of Ownership (TCO) for Church LED Walls
Smart budgeting reduces surprises and keeps your LED investment delivering for a decade or more. Use the buckets, drivers, and TCO levers below to build a realistic, stewardship-minded plan.
Budget buckets churches often overlook
- Display hardware and controllers
- dvLED cabinets/modules, frames, power supplies (include primary and spare PSUs), receiving/sending cards, mounting hardware.
- Structural/rigging, wall prep, and seismic bracing where required
- Engineering stamps, wall reinforcement, rigging hardware, safety cabling, lifts, scaffolding.
- Electrical circuits, power distribution, and HVAC load
- Dedicated breakers, power conditioning/surge suppression, additional HVAC capacity for heat from LED/processing racks.
- Control system, playback machines, and switching
- ProPresenter by Renewed Vision (https://renewedvision.com/propresenter/), switchers/routers (e.g., Blackmagic Design ATEM: https://www.blackmagicdesign.com/), capture/IO for IMAG/streaming (BMD capture/IO on same site), network, and KVM.
- LED processing (e.g., Novastar processors: https://www.novastar.tech/) for mapping, scaling, redundancy, and color calibration.
- Commissioning, alignment, color calibration, training, service
- Onsite alignment, seam uniformity, module calibration, workflow training for volunteers and staff, documentation, spare kits.
Price drivers
- Pixel pitch, total area, brightness class, cabinet quality
- Finer pitch = more LEDs per square foot, higher cost; larger walls scale costs quickly.
- Processing capabilities and redundancy
- Higher scan rates (e.g., ≥ 3840 Hz), deeper grayscale/HDR pipelines, low-latency IMAG modes, and hot backup sending/receiving cards increase budget.
- Indoor vs. outdoor cabinets; install vs. rental series
- Outdoor requires weatherproof enclosures (IP rating, UV-resistant masks, coatings), airflow, and higher brightness, all of which raise costs. Rental/touring cabinets add handles/locking hardware for frequent reconfiguration.
- Integration complexity
- Custom structures (curved, flown), long cable runs, networked control rooms, and multi-destination video routing add time and material.
TCO considerations
- Energy usage and dimming schedules
- Real-world average power is typically far below “maximum” spec sheets. Use ambient light sensors and service presets (weekday vs. Sunday) to reduce draw and heat, extending component life.
- Serviceability and spares kit strategy
- Front-serviceable cabinets simplify maintenance. Keep 2–5% spare modules, extra PSUs, receiving cards, and calibration backups onsite for fast fixes.
- Warranty length and advance replacement
- Compare 3–5 year coverage, pixel failure thresholds, and advance replacement SLAs. Extended warranties may be cost-effective for high-use sanctuary walls.
- Lifecycle and upgrade planning
- Budget for processor firmware updates, color re-calibration over time, and potential camera or switcher upgrades as your IMAG/livestream grows.
Sample budget ranges (guidance, not quotes)
These turnkey planning ranges include typical indoor P2.9–P3.9 dvLED cabinets, mounting structure, LED processing, control gear allowance, electrical/HVAC contingencies, and commissioning. Actual pricing varies by vendor, region, engineering needs, and feature set.
- 16 ft wide (approx. 16×9 ft, 16:9) P2.9–P3.9 indoor
- Rough planning range: $60,000–$120,000
- Use cases: small-to-mid sanctuaries, clear lyrics/IMAG
- 20 ft wide (approx. 20×11.25 ft, 16:9) P2.9–P3.9 indoor
- Rough planning range: $90,000–$180,000
- Use cases: mid-to-large sanctuaries, strong IMAG presence
- 24 ft wide (approx. 24×13.5 ft, 16:9) P2.9–P3.9 indoor
- Rough planning range: $120,000–$240,000
- Use cases: large sanctuaries, broadcast-grade IMAG, scenic flexibility
Disclaimers:
- Ranges are directional planning tools only – no hard quotes. Final costs depend on pixel pitch, brightness, cabinet series, engineering/rigging, processor class, redundancy, delivery/installation schedules, and local code requirements.
- Outdoor monument or marquee signs (e.g., P6–P10) can range widely ($30,000–$150,000+) based on size, structural foundation, electrical trenching, and city permitting.
Typical line-item allocation (for planning)
- Display hardware (cabinets, modules, power/receiving cards, structure): 45–65%
- Processing and control (LED processors, switchers, playback, capture/IO): 10–20%
- Electrical, power conditioning, HVAC adjustments: 5–15%
- Engineering, rigging, and permitting: 8–20%
- Commissioning, calibration, programming, training: 5–10%
- Contingency and spares kit: 5–10%
Practical ways to stretch the budget
- Right-size pixel pitch to the first row distance; avoid overbuying ultra-fine pitch.
- Keep content 16:9 unless scenic needs require ultra-wide – fewer pixels, less processing.
- Use auto-dimming and event presets to reduce average power draw and heat.
- Start with a strong processor (e.g., Novastar or similar) that supports redundancy and future scaling.
- Phase gear purchases: begin with essential IMAG chain (ATEM switcher, BMD capture/IO) and add cameras/displays over time.
Representative product links (for context, not endorsements):
- ProPresenter by Renewed Vision: https://renewedvision.com/propresenter/
- Blackmagic Design ATEM switchers and ecosystem: https://www.blackmagicdesign.com/
- Blackmagic Design capture/IO: https://www.blackmagicdesign.com/
- Novastar LED processors and controllers: https://www.novastar.tech/
Installation Methods and Infrastructure: Flown, Wall-Mounted, Ground-Supported
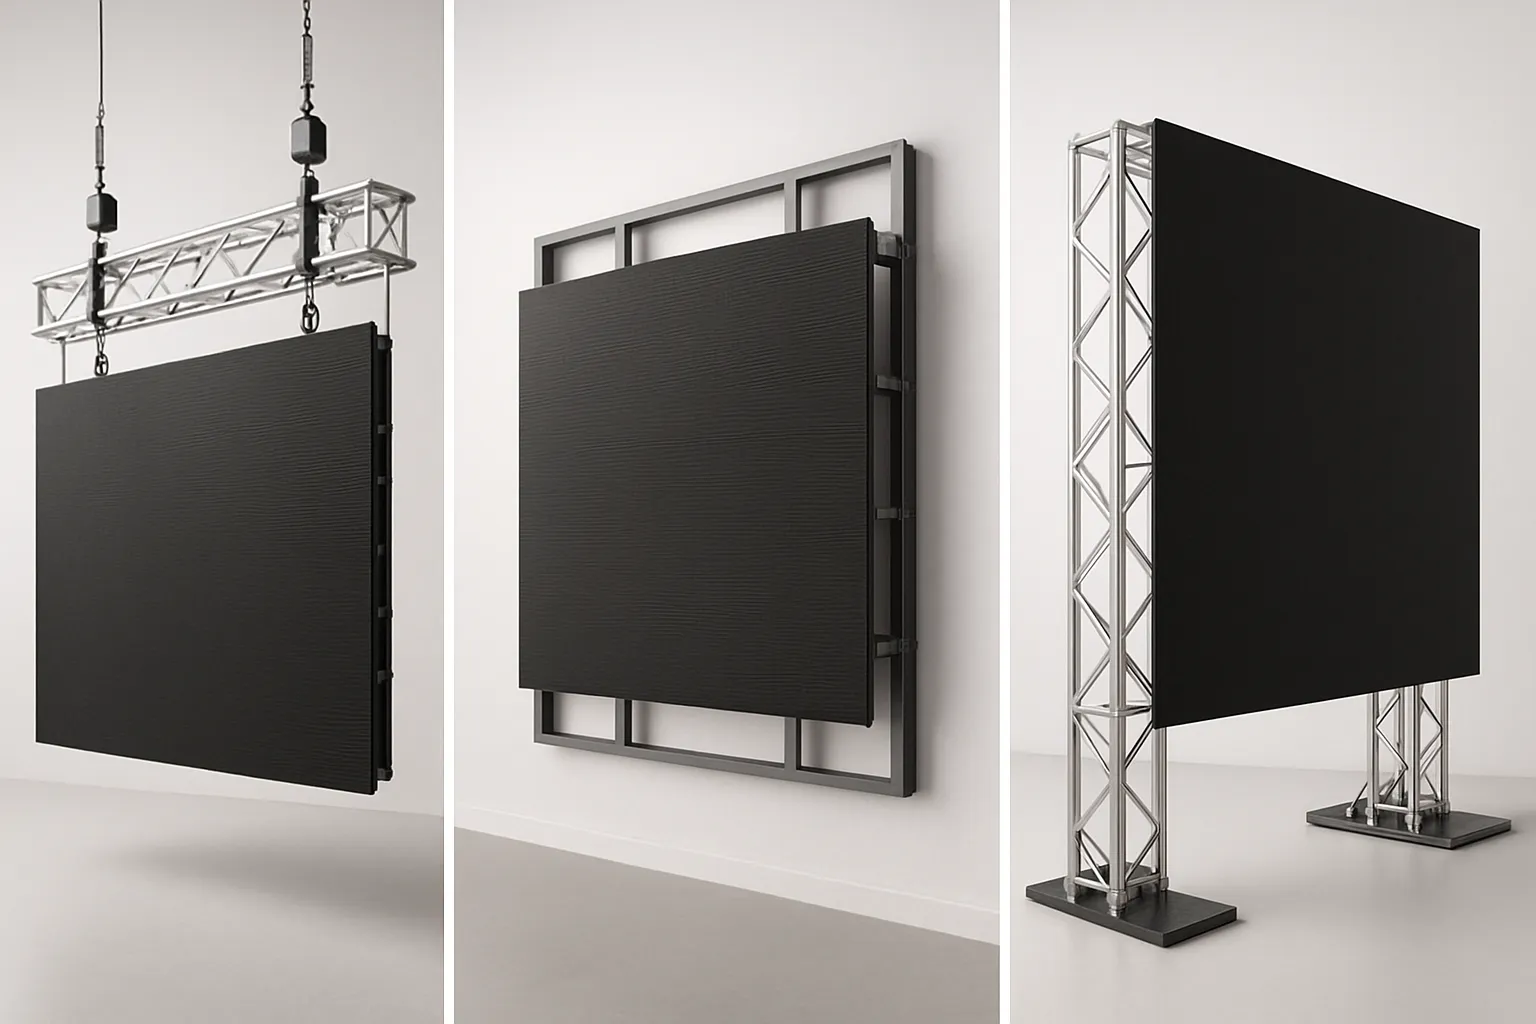
Structural options
- Flown (truss/rigging points)
- Verify building steel capacity, load ratings, and deflection under dynamic and static loads.
- Use certified rigging hardware (chain hoists, shackles, rated slings) and secondary safety devices (safeties/steel).
- Plan trim heights for sightlines, lighting throws, and projector beams (if hybrid).
- Wall-mounted
- Confirm load-bearing capacity with a structural engineer; include anchors, backing, and spreader plates as needed.
- Shim and laser-align frames; allow front-service or rear-service access with safe service lanes.
- Consider vibration isolation where subwoofers/low-frequency energy is high.
- Ground-supported
- Use engineered stage carts, base plates, vertical truss, and outriggers/ballast sized for wall weight and height.
- Ideal for portable sanctuaries, multipurpose rooms, and event sets.
- Ensure cord management and ADA-compliant paths behind/around the structure.
Power, data, and thermal
- Circuit planning and distribution
- Balance phases across dedicated circuits; include surge suppression and power sequencing where appropriate.
- Provide local disconnects where code requires; allow spare capacity for growth.
- Data topology
- Design primary and backup data lines (A/B) to each cabinet string; home-run to controller locations.
- Keep processors close to the wall for shorter runs and reduced failure points; use quality CAT/etherCON or fiber for longer distances.
- Thermal and acoustics
- Estimate heat output at real-world average loading; ensure quiet HVAC near the stage to protect speech intelligibility.
- Provide ventilation clearances for processors/racks; avoid hot returns directly over the wall.
Commissioning and safety
- Acceptance testing
- Factory Acceptance Test (FAT) for cabinet and processor firmware/compatibility; Onsite Acceptance Test (OAT) for image mapping, redundancy, and safety checks.
- Calibration and image quality
- Pixel mapping verification, uniformity tuning, color calibration, grayscale/black-level checks, refresh-rate validation for IMAG cameras.
- Safety and periodic inspection
- Document rigging/electrical inspections, torque specs, and safety device checks; set intervals for reinspection.
- Use qualified technicians for work at height; rope access procedures where applicable.
Optional rigging resources:
- ETCP/ESTA rigging best practices: https://estahome.org/ and https://etcp.esta.org/
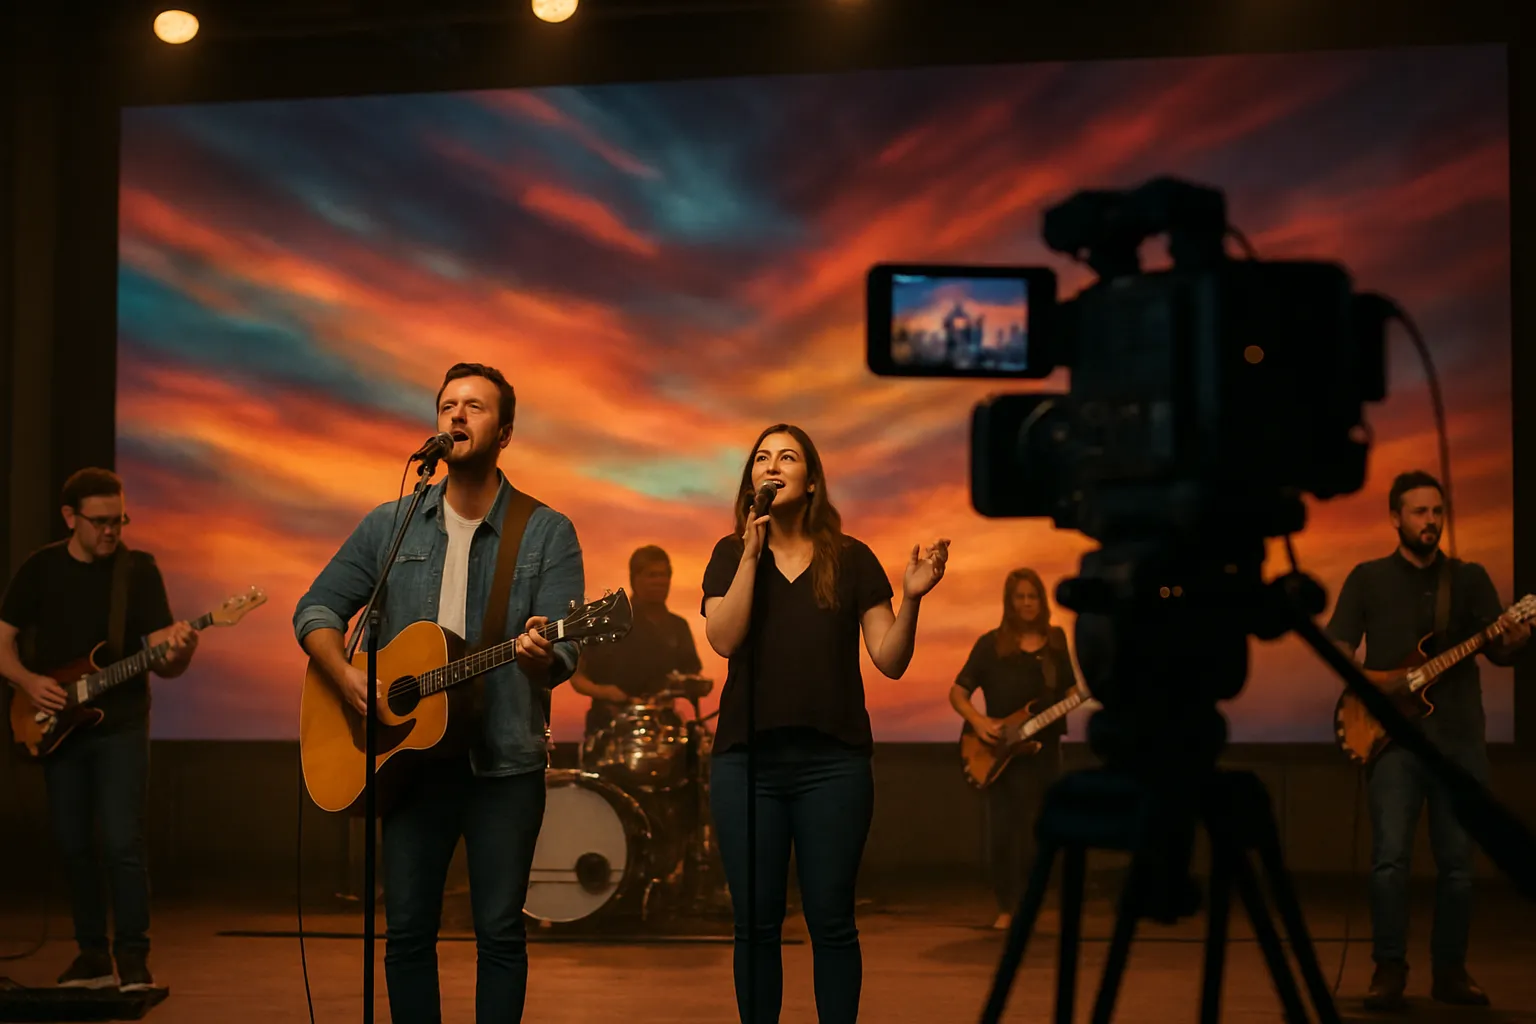
Content, Cameras, and Worship Workflows (IMAG, Lyrics, Livestream)
Building a service-ready pipeline
- Lyrics/slides and motion backgrounds
- Drive lyrics and sermon slides with ProPresenter (https://renewedvision.com/propresenter/). Use clear fonts, high contrast, and safe margins for readability from the back row.
- Low-latency IMAG and pre-service loops
- Route camera feeds through your switcher and LED processor with minimal latency. Run pre/post-service loops or ambient looks between sets to avoid dead air.
- Playback machines and sync
- Maintain primary/backup playback computers; keep content libraries mirrored. For complex multimedia shows, consider timeline or cue-based tools such as Resolume (https://resolume.com/) or QLab (https://qlab.app/).
- For network-based video transport and flexible routing, explore NDI (https://ndi.video/).
- Capture for livestream
- Use your switcher’s program feed (with clean audio bus) into your encoder. Verify graphics layers and lower-thirds for online readability.
- Scene presets for sermon, worship, announcements
- Create presets for lighting, switcher M/Es, and LED processor color/brightness. Label cues consistently in your show file for volunteers.
Camera and LED interaction
- Sensor, shutter, and refresh rate
- Match camera shutter angle and frame rate to the LED wall refresh (≥ 3840 Hz ideal). Test under service lighting to avoid banding or scan artifacts.
- Framing for large LED backdrops
- Avoid tight patterns that trigger moiré; favor softer bokeh or abstract content behind close-ups. Keep presenter skin tones properly exposed; set white balance to house key lighting.
- Dynamic range and exposure
- Use log or wide-gamut profiles if your switcher and color pipeline support them. Protect highlights on LED content and ensure faces remain the exposure priority.
Creative design ideas for engagement
- Ultra-wide backgrounds
- 32:9 canvases create immersive color fields while keeping center 16:9 areas for IMAG and teaching content.
- Scenic LED stripes and side IMAG walls
- Add narrow LED columns or side screens for lyric overflow and sermon notes; drive with your media server for synchronized looks.
- Seasonal looks with modular reconfiguration
- Re-stack cabinets into different shapes during Advent/Easter or youth events. Pre-build content packages so visual identity changes are fast and repeatable.
Top Church LED Vendors and Price Comparison (2026)
Choosing the right church LED wall partner isn’t just about the lowest quote – it’s about warranty support, video processing, and proven installs in ministry environments. Use the criteria and vendor-agnostic table below to plan confidently and compare apples to apples.
How to evaluate a church LED vendor
- Warranty and advance replacement terms
- Look for clear pixel failure thresholds, 3–5 year coverage, and advance replacement options for critical Sundays.
- North American service network and parts availability
- Confirm regional parts depots, loaner processors, and response SLAs.
- Controller ecosystem compatibility (Novastar/Brompton)
- Ensure compatibility with your workflow: common ecosystems include Novastar (broadly used) and Brompton (advanced calibration/IMAG performance).
- Certification, safety ratings, and references in houses of worship
- Request UL/ETL listings, IP ratings (as applicable), structural drawings, and recent church references with similar sizes and budgets.
Representative brands to consider (vendor-agnostic)
- Absen, Unilumin, Planar/Leyard, Samsung (The Wall), LG MAGNIT, ROE Visual, Daktronics, MAXHUB, SNA Displays
Price comparison notes and disclaimers
- Street pricing varies widely by pixel pitch, cabinet series, brightness class, options (redundant power/data), and region.
- Budget bands are planning guidance only (not quotes). Engage an integrator for site-specific engineering, rigging, electrical, and commissioning costs.
Vendor comparison for churches (2026 planning guide)
| Brand | Typical fine-pitch ranges for sanctuaries | Typical outdoor ranges | Typical warranty (years) | North America service presence | Example series link | Estimated budget band for a 16–20 ft wide 16:9 wall at P2.9–P3.9 |
|---|---|---|---|---|---|---|
| Absen | P1.5–P3.9 (varies by series) | P4–P10 | 3–5 | Broad NA partner/integrator network | https://www.absen.com/ | ~$70k–$160k (features/brightness dependent) |
| Unilumin | P1.5–P3.9 | P4–P10 | 3–5 | Established NA presence via partners | https://www.unilumin.com/ | ~$80k–$170k |
| Planar/Leyard | P1.2–P3.9 (high uniformity, install-focused) | P4–P10 (project-based) | ~5 | Strong NA service and direct support | Planar: https://www.planar.com/ • Leyard: https://www.leyard.com/ | ~$110k–$220k |
| Samsung (The Wall) | Sub-1.6 mm microLED (premium, ultra-fine) | N/A (microLED focus) | 3–5 | Strong OEM presence, project-based support | https://displaysolutions.samsung.com/led-signage/the-wall | Not applicable for P2.9–P3.9; microLED often $300k–$1M+ for similar widths |
| LG MAGNIT | Sub-1.2–1.5 mm microLED (premium) | N/A (microLED focus) | 3–5 | Strong NA channel support | https://www.lg.com/us/business/digital-signage/lg-magnit | Not applicable for P2.9–P3.9; microLED often $300k–$1M+ for similar widths |
| ROE Visual | P1.5–P3.9 (touring and install series) | P4–P10 | 3–5 | Robust events/install support in NA | https://www.roevisual.com/ | ~$120k–$230k |
| Daktronics | P1.9–P3.9 (install), extensive outdoor | P4–P16 (monuments/scoreboards) | ~5 | Extensive NA engineering and service | https://www.daktronics.com/ | ~$120k–$250k (project scope dependent) |
| MAXHUB | P2.5–P3.9 (value-focused) | P6–P10 | 3 | Growing NA distribution | https://www.maxhub.com/ | ~$50k–$130k |
| SNA Displays | P1.5–P3.9 (custom projects) | P4–P10 | ~5 | Strong NA custom/project support | https://snadisplays.com/ | ~$120k–$240k |
Notes:
- Budget bands reflect typical indoor dvLED packages sized around 16–20 ft wide, 16:9 aspect, P2.9–P3.9, including cabinets, structure, standard processing (e.g., Novastar-class), and commissioning allowances – but excluding significant building modifications, complex rigging, or extensive electrical/HVAC upgrades.
- For microLED (Samsung The Wall, LG MAGNIT), pixel pitches are much finer (sub-1.6 mm), driving substantially higher cost; most churches will achieve excellent results with P2.5–P3.9 dvLED at a fraction of the price.
- Outdoor signage involves additional costs for foundations, steel/monument structures, electrical trenching, permitting, and higher-brightness/weatherized cabinets (IP65+ fronts).
FAQs and Sources
Frequently Asked Questions
- What pixel pitch is best for a 500–800 seat sanctuary?
- Typical first row 20–35 ft: P2.6–P3.9 is a solid range. Validate final size with AVIXA DISCAS and run camera tests to check for moiré and banding.
- How bright should an indoor church LED wall be?
- About 800–1200 nits for most sanctuaries, with dimmable presets for comfort and camera exposure. Use auto-brightness for consistent looks across services.
- Can we reconfigure our LED wall for events?
- Yes. Modular cabinets can be re-stacked into creative layouts with proper rigging, power/data planning, and processor re-mapping. Keep spare rigging and cables organized for fast changeovers.
- Do we need a high-refresh LED wall for IMAG?
- Prefer ≥ 3840 Hz to minimize scan lines and banding with modern camera shutter/frame rates, especially under stage lighting.
- Should we choose 16:9 or an ultra-wide backdrop?
- 16:9 simplifies content and IMAG. Ultra-wide (e.g., 32:9) enhances scenic ambience; you can still embed 16:9 IMAG windows within it.
Sources and further reading
- AVIXA DISCAS (image size for 2D content): https://www.avixa.org/standards/discas
- Market outlook for LED video walls (Grand View Research): https://www.grandviewresearch.com/industry-analysis/led-video-walls-market
- LED control systems and processors
- Novastar LED control systems: https://www.novastar.tech/
- Brompton Technology processors: https://www.bromptontech.com/
- Rigging and safety references
- ESTA (entertainment rigging best practices): https://esta.org/
- ETCP (Entertainment Technician Certification Program): https://etcp.esta.org/
- Representative vendor sites (from Section 8)
- Absen: https://www.absen.com/
- Unilumin: https://www.unilumin.com/
- Planar: https://www.planar.com/
- Leyard: https://www.leyard.com/
- Samsung The Wall (microLED): https://displaysolutions.samsung.com/led-signage/the-wall
- LG MAGNIT (microLED): https://www.lg.com/us/business/digital-signage/lg-magnit
- ROE Visual: https://www.roevisual.com/
- Daktronics: https://www.daktronics.com/
- MAXHUB: https://www.maxhub.com/
- SNA Displays: https://snadisplays.com/
Conclusion: Start Planning Your Church LED Wall with The Audiovisual Consultant
LED wins for worship because it’s bright, flexible, and built to last. The playbook is simple: choose pixel pitch by your closest seating distance, validate image size with AVIXA DISCAS, and plan your infrastructure early (power, rigging/structure, processing, HVAC, and control). When you match dvLED to sightlines, content, and camera workflows, your congregation gets clearer lyrics, better IMAG, and a more engaging worship environment.
Next steps we recommend:
- Site survey: measure stage width/height, trim heights, cable paths, and FOH positions
- Seating map: chart first/mid/farthest viewer distances for DISCAS validation
- Content audit: lyrics, IMAG, sermon visuals, and livestream overlays
- Power/rigging check: circuits, distribution, thermal load, structure/rigging points
- Demo evaluation: compare pixel pitches, brightness, processing, and service plans
